In the last post I introduced the concept for the ultimate tire swing, a physical manifestation of the nostalgia and symbolism that makes certain kinds of fiction great. We went over the tools and supplies required and took a look at the big picture. Today, we get into the nitty gritty details.
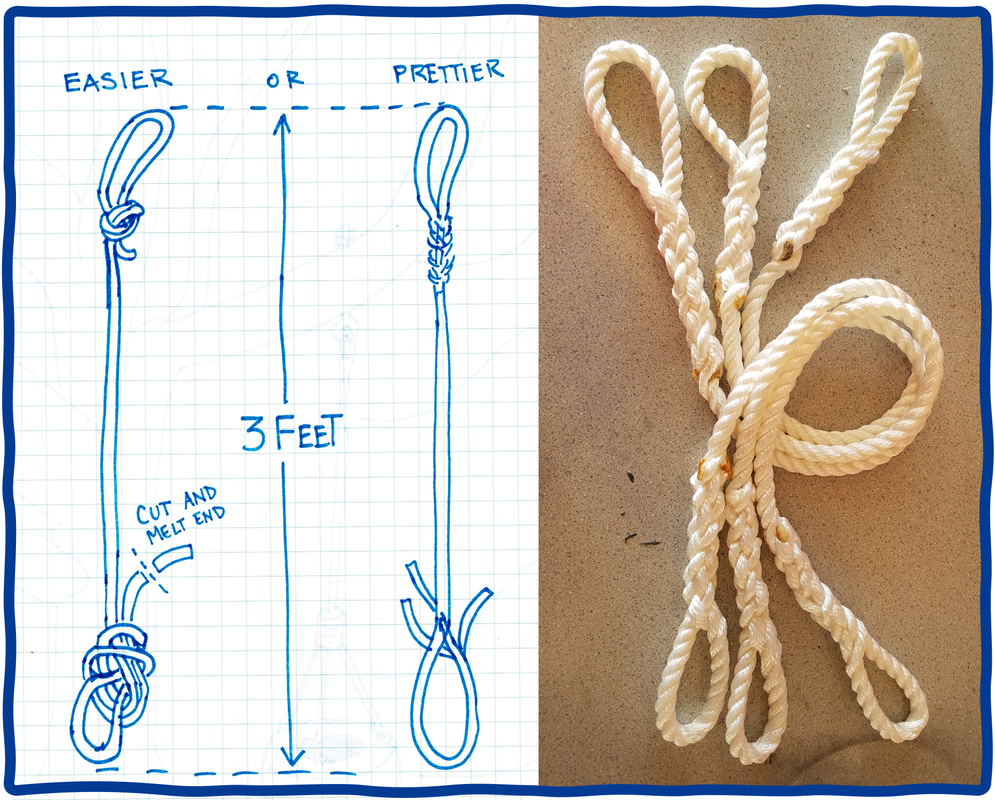
Step 1: Make Three Lengths of Rope with Loops on Each Side
The goal here is three lengths of rope that measure three feet from loop to loop. There are two ways to go about this:
The easy way: Cut about 5 feet of rope and tie loop knots at both ends. Adjust one of the knots until you measure 3 feet from end-to-end, then trim the excess and use a lighter to melt the rope end (this prevents fraying). An overhand loop knot is super easy and perfectly adequate, but a perfection loop or poacher's knot are almost as quick and look a little cleaner.
The slightly-harder way: Do the same thing, but splice loops in the rope rather than tying knots. This is what I did, and it's actually pretty easy with braided rope. I used this video (4.5 million views can't be wrong), but here is a nice written tutorial if you prefer something you can print and quick-reference.
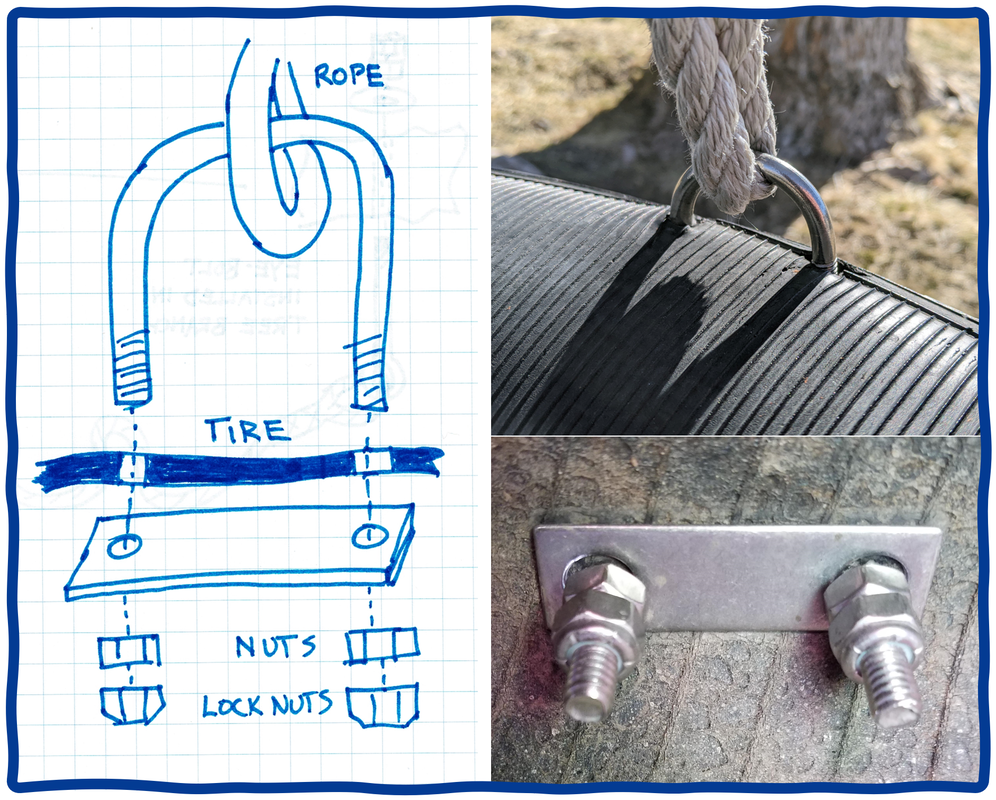
Step 2: Attach Three Ropes to a Tire with U-bolts
- Drill or poke two holes in the top of the tire
- Loop U-bolt through a rope loop, then poke through the holes
- Secure with plate, nuts, and lock nuts on the inside of the tire
- Repeat to attach three ropes, evenly spaced around the tire
Step 3: Attach a Long Rope to an Eye Bolt
Loop one end of a rope to the eye bolt (knot or splice). The rope needs to be at least long enough to reach from the tree branch to the tire, with a few feet of extra for tying a nice knot. Just use the rest of your rope - you can cut it to length later.
Loop one end of a rope to the eye bolt (knot or splice). The rope needs to be at least long enough to reach from the tree branch to the tire, with a few feet of extra for tying a nice knot. Just use the rest of your rope - you can cut it to length later.
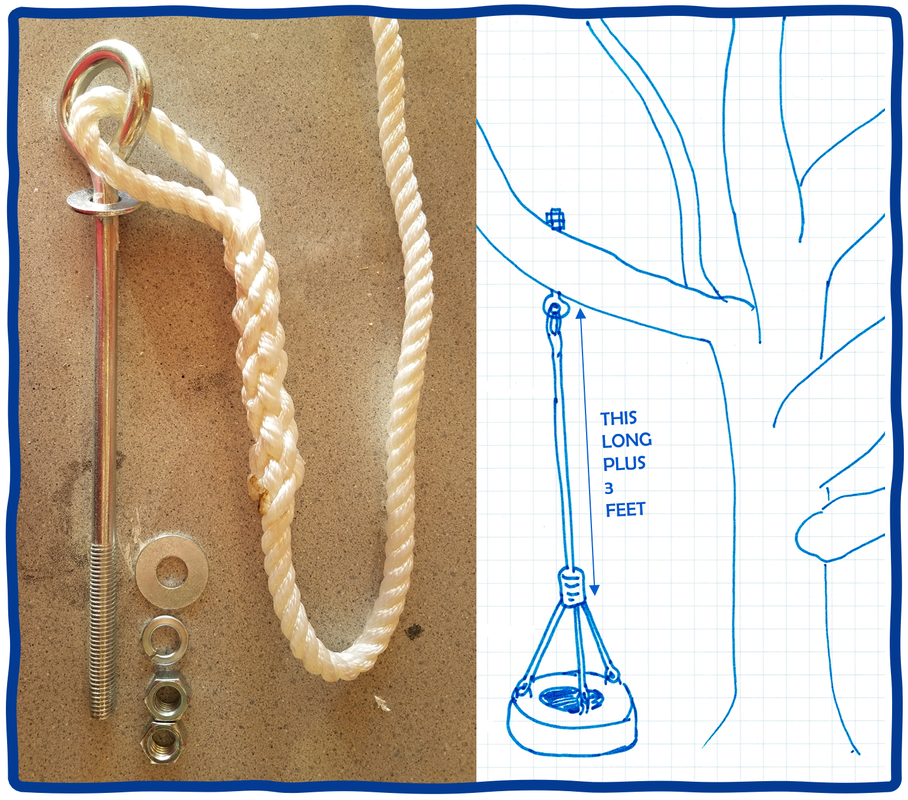
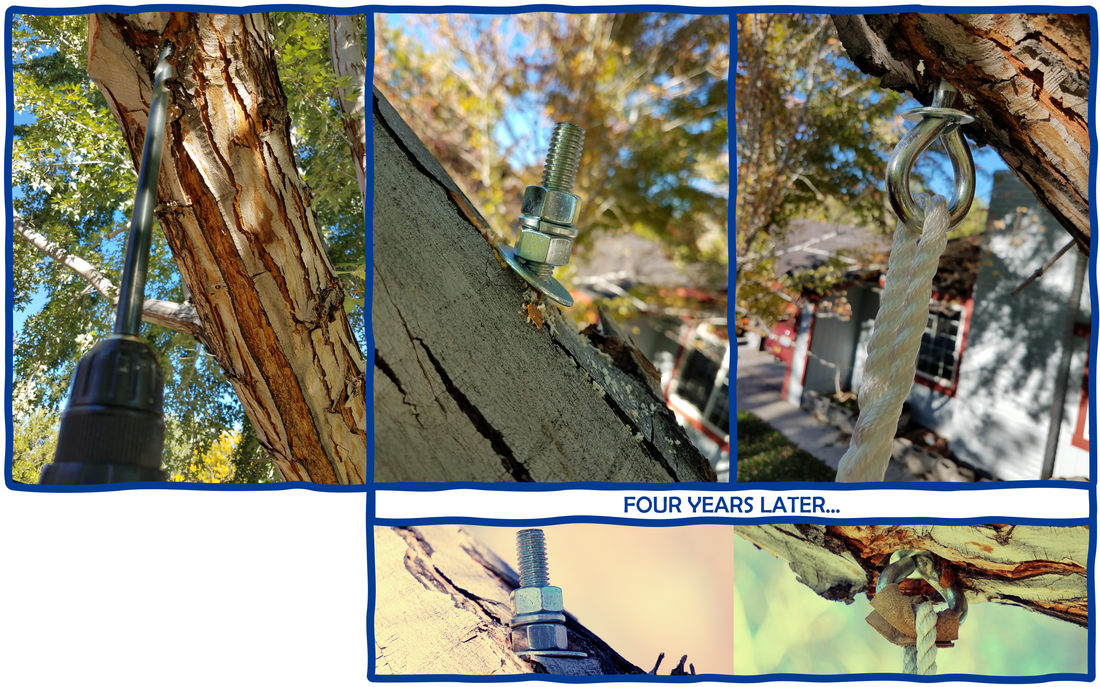
Step 4: Install the Eye-Bolt in a Tree Branch
- Use the long drill bit to drill a hole through your chosen branch*
- Put one washer on the eye bolt, then push it up through the hole
- Install a washer - nut - lock washer - nut on the top side.
- Leave some room for the branch to grow. Notice how much my branch has grown in four years... it's time to loosen the nuts a bit to delay the tree growing completely over the eye bolt.
- Tighten the nuts to squeeze the lock washer tight - this will help prevent the nuts from slowly unscrewing themselves.
- Pro-tip - slipping a piece of leather or some old jeans between the rope and the eye bolt keeps the swing from squeaking when it gets wet
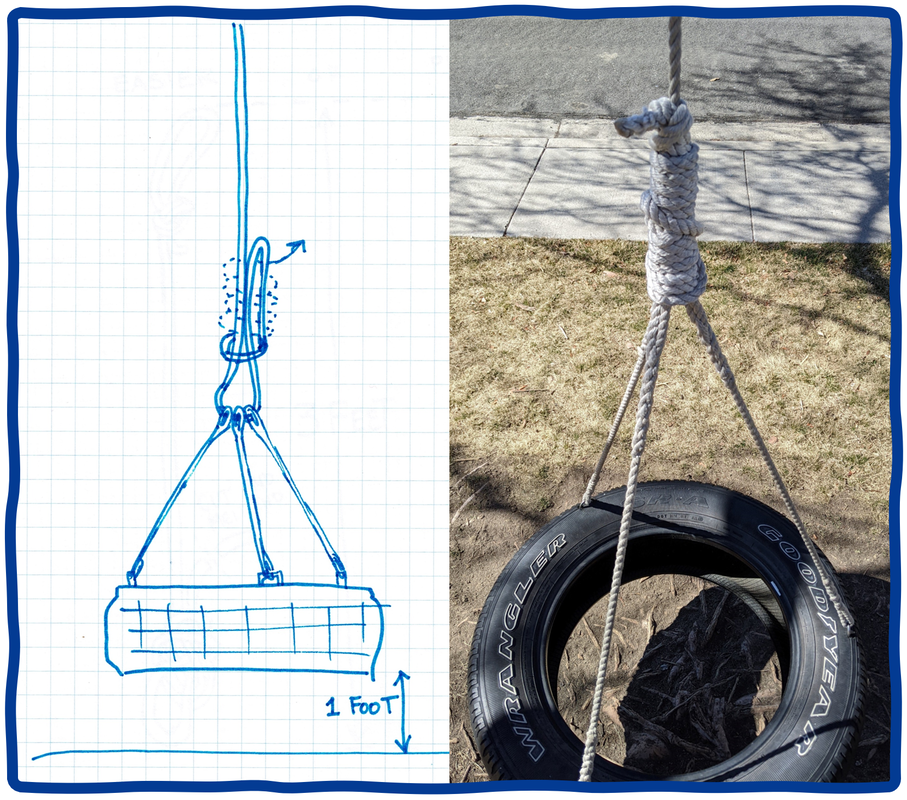
Step 5: Tie the Ropes Together to Finish the Swing
Loop the dangling end of your long rope through each of the three ropes attached to the tire and tie a knot of your choice. I chose a hangman's knot, which looks cool and makes a nice grip for kids to hold, but there are lots of good choices.
You may have to re-tie the knot a couple times to get everything to tighten up at the right height. If not, you're more skilled than me... :)
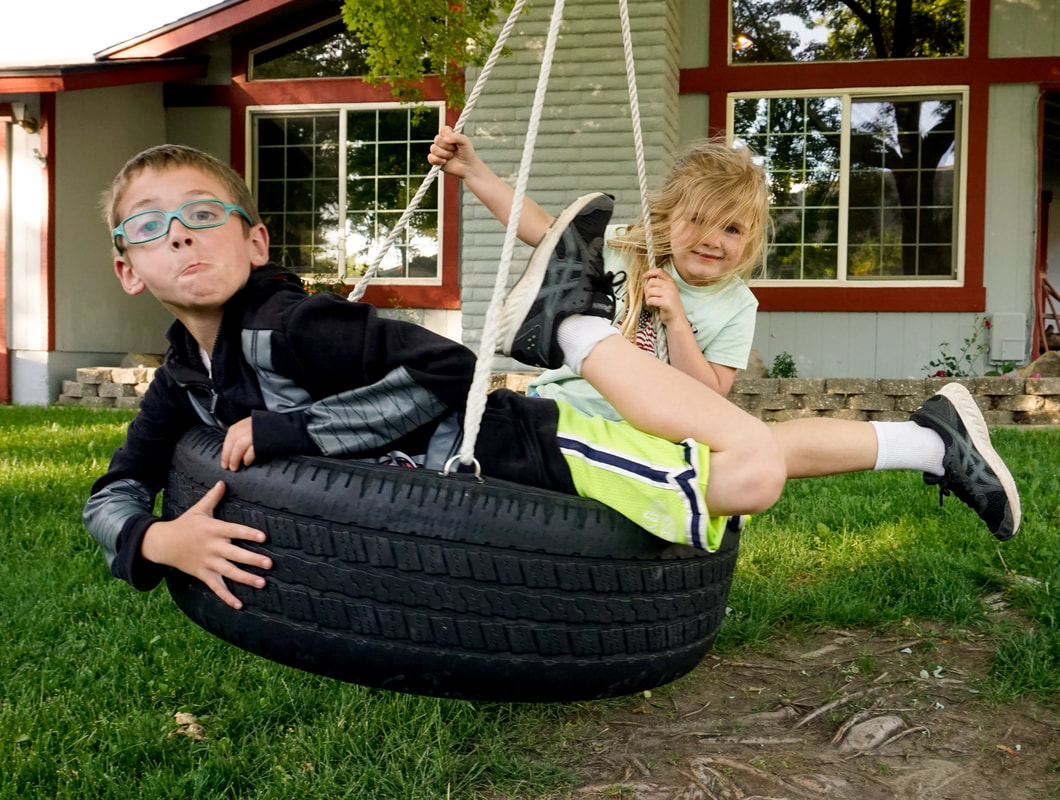
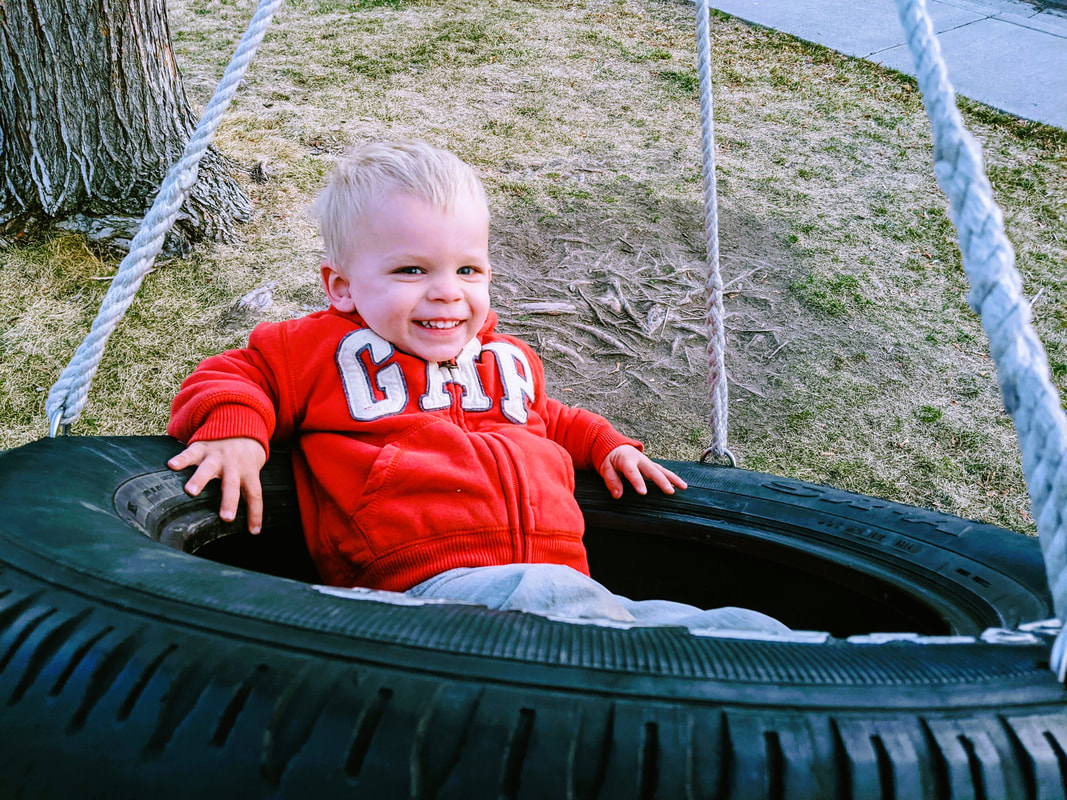
Step 6: Enjoy for Years to Come
This tire swing is still going strong after four years of fun. It's often covered with snow, roasting in 100-degree heat, or holding five bouncing kids at a time. There's a bald spot in our lawn that testifies to many, many hours of play time.
This tire swing is still going strong after four years of fun. It's often covered with snow, roasting in 100-degree heat, or holding five bouncing kids at a time. There's a bald spot in our lawn that testifies to many, many hours of play time.
Thanks for reading! If you enjoyed this article, I hope you'll consider reading one of my fantasy novels and connecting with me on Facebook or Twitter.
 RSS Feed